


-
Блок 1. NURBS кривые
В этом блоке вы освоите применение инструментов – NURBS кривые.
Кривые- это основа поверхностного моделирования . Мы построим 2 логотипа, изучим инструменты создания замкнутых кривых. Дальше кривые используем для построения объемной детали с помощью выдавливания замкнутых областей.
В конце темы вы найдете интересные задания, которые дополнят ваши знания по кривым, как основам для поверхностей.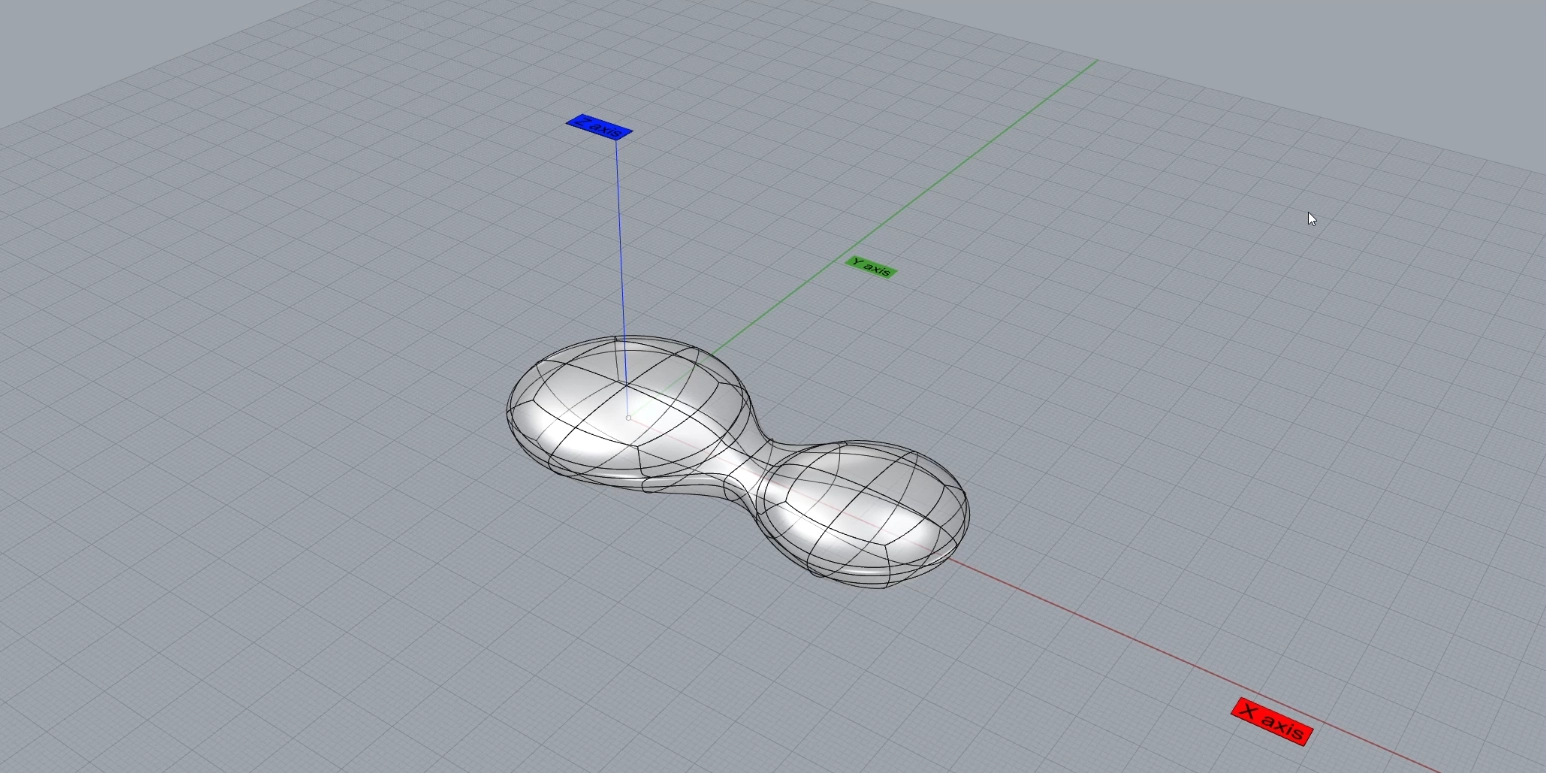
-
Блок 2. NURBS поверхности
В этом блоке мы рассмотрим с вами основные инструменты создания поверхностей.
Разделим этот материал на 2 группы: NURBS поверхности и SubDivide – новый набор инструментов для создания органических, аморфных 3D объектов.
Инструменты создания поверхностей – 5 команд которые дадут вам свободу моделирования. После создания поверхностей их необходимо соединить между собой используя инструменты сопряжения и анализа- Zebra. Изучив видео из этого блока вы перейдете на новый уровень владения программой. Знакомство с SubDivide инструментами продолжим в следующей теме.
Задание порадует вас примерами с применением параметрических алгоритмов Grasshopper и научит вас применять UV развертку для переноса текстуры с плоскости на криволинейную поверхность.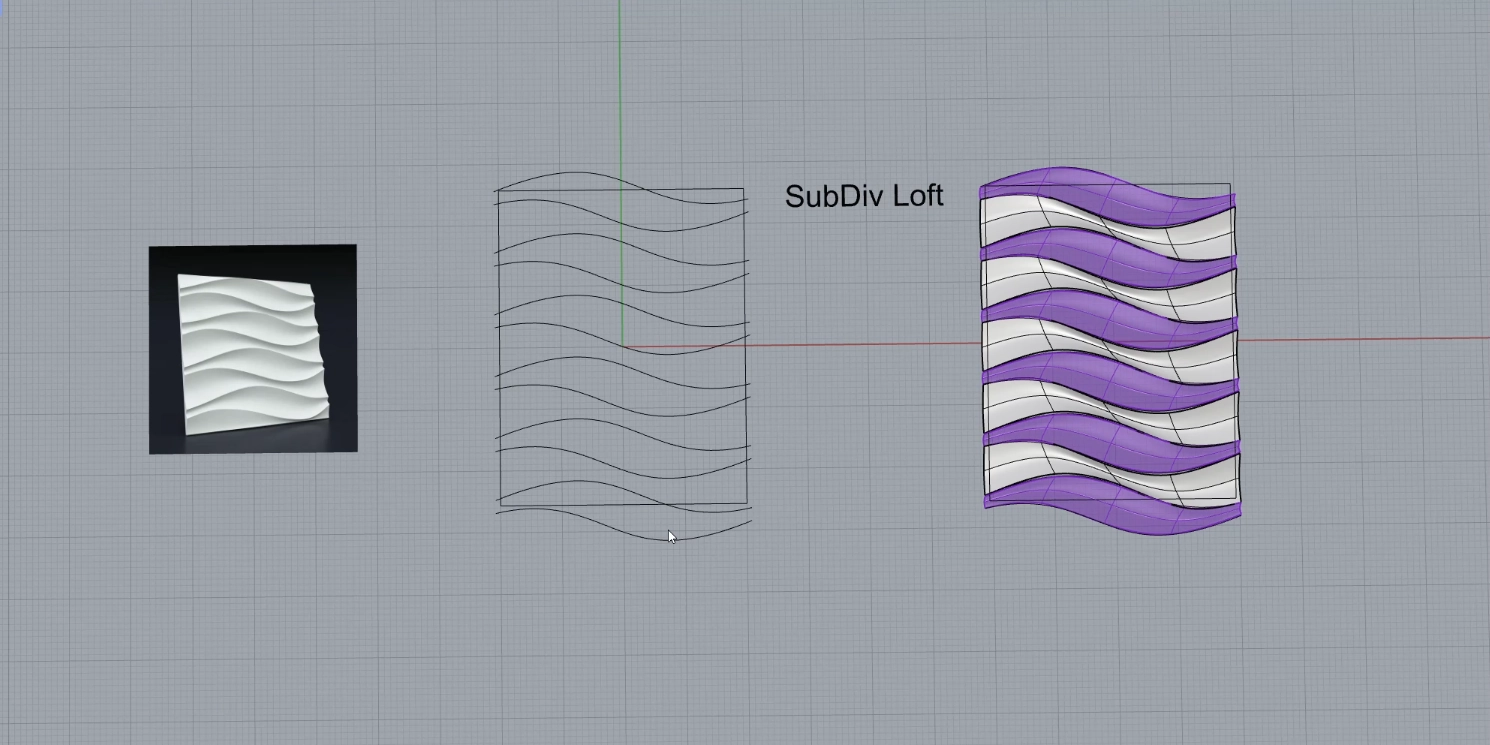
-
Блок 3. SubD поверхности
В этом блоке вы познакомитесь с новой логикой построения – SubDiv поверхности.
Она отличается от NURBS и ближе к полигональному моделированию.
Вы увидите и попробуете как работают SubDiv. Выбор частей модели осуществляется через фильтры : точки, ребра, поверхности.
Редактируя примитив вы создадите готовую форму за несколько этапов, сможете ее видоизменять на каждом их них, применяя фильтры выбора и парящие точки или ребра.
Отдельно отмечу, что эти инструменты научат вас пользоваться манипулятором и помогут развить пространственное объемное восприятие объектов. Пройдя все видео этого блока вы становитесь 3д модельером, который владеет двумя разными технологиями построения – классическое поверхностное моделировании и SubDiv с логикой полигонального моделирования, которую можно встретить в Blender или 3Ds max.
Задания добавят практики в освоении SubDiv техники, в материалах вы найдете файл для SubDiv инструментов в виде таблицы блока.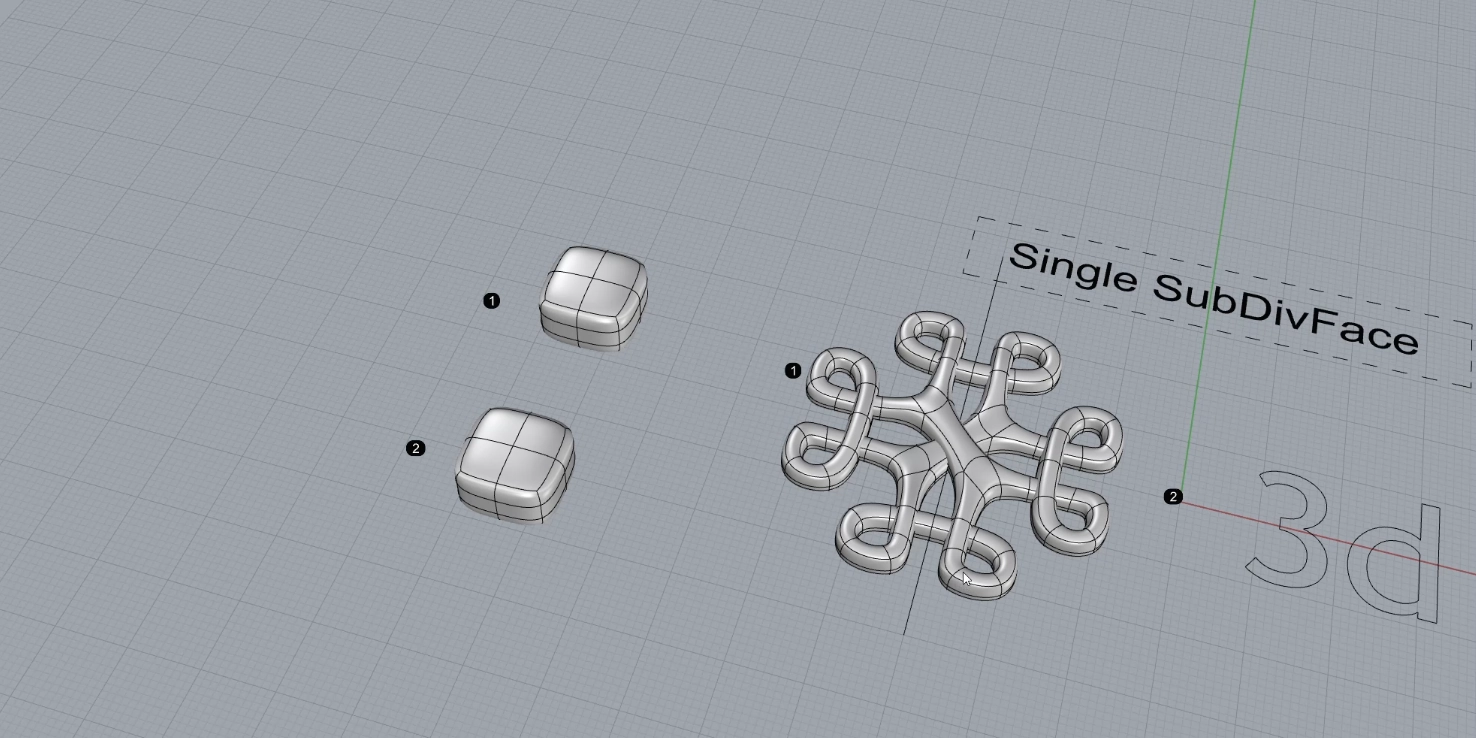
-
Блок 4. Редактирование NURBS поверхностей
Попробуйте воспринимать готовую 3D модель как нечто динамичное и редактируемое. Этим на самом деле и есть NURBS поверхности. Пока они заперты в полиповерхность, их мы не можем редактировать. Как только мы разделяем полиповерхность на отдельные кусочки, то имеем возможность изменять их.
Этот блок научит вас редактировать поверхности благодаря использованию инструментов Control points.
Взаимодействие с контрольными точками поверхности относится к продвинутому методу редактирования и сравнимо со скульптингом.
Ваши самые сложные модели так или иначе будут нуждаться в этом методе редактирования. Повторяя упражнения из данного блока, вы тренируетесь применять этот метод.
Еще мы освоим практику визуализации. Также вы научитесь с помощью Grasshopper анализировать наборы поверхностей и отфильтровать их.
Задания этой темы содержат повторения и решения задач, связанных с редактированием поверхностей, развертками и параметрическим модулем Grasshopper.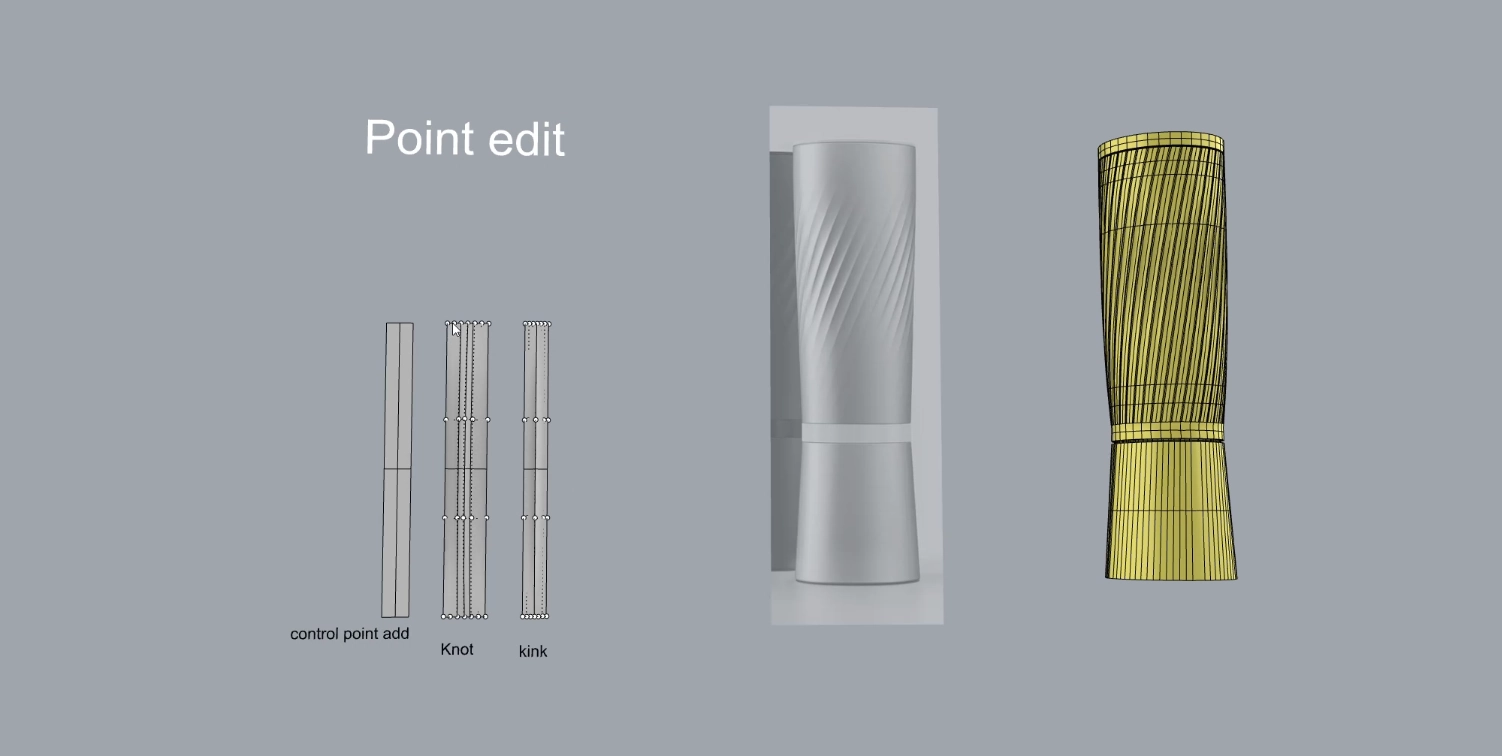
-
Блок 5. Трансформация объектов
На этом этапе изучим инструменты трансформации.
На колесо расставляем элементы для создания фактуры, используем разные способы переноса из плоскости на свернутую поверхность элементы для вычитания. На еще одном примере расставляем массив элементов вдоль кривой и вдоль кривой на поверхности, при редактировании кривой элементы также меняются, выполняется работа с историей.
В задании продолжение темы 5 – построение скрученного по спирали объекта. Твист, скрученный объект, применяется в кованых изделиях, для получения филигранных косичек. Рассматриваем способ получения из ровного объекта скрученного и переносим его вдоль свернутой кривой, используем инструменты Twist, FlowOnSurface, FlowOnCurve. После необходимо проанализировать длину обеих кривых.
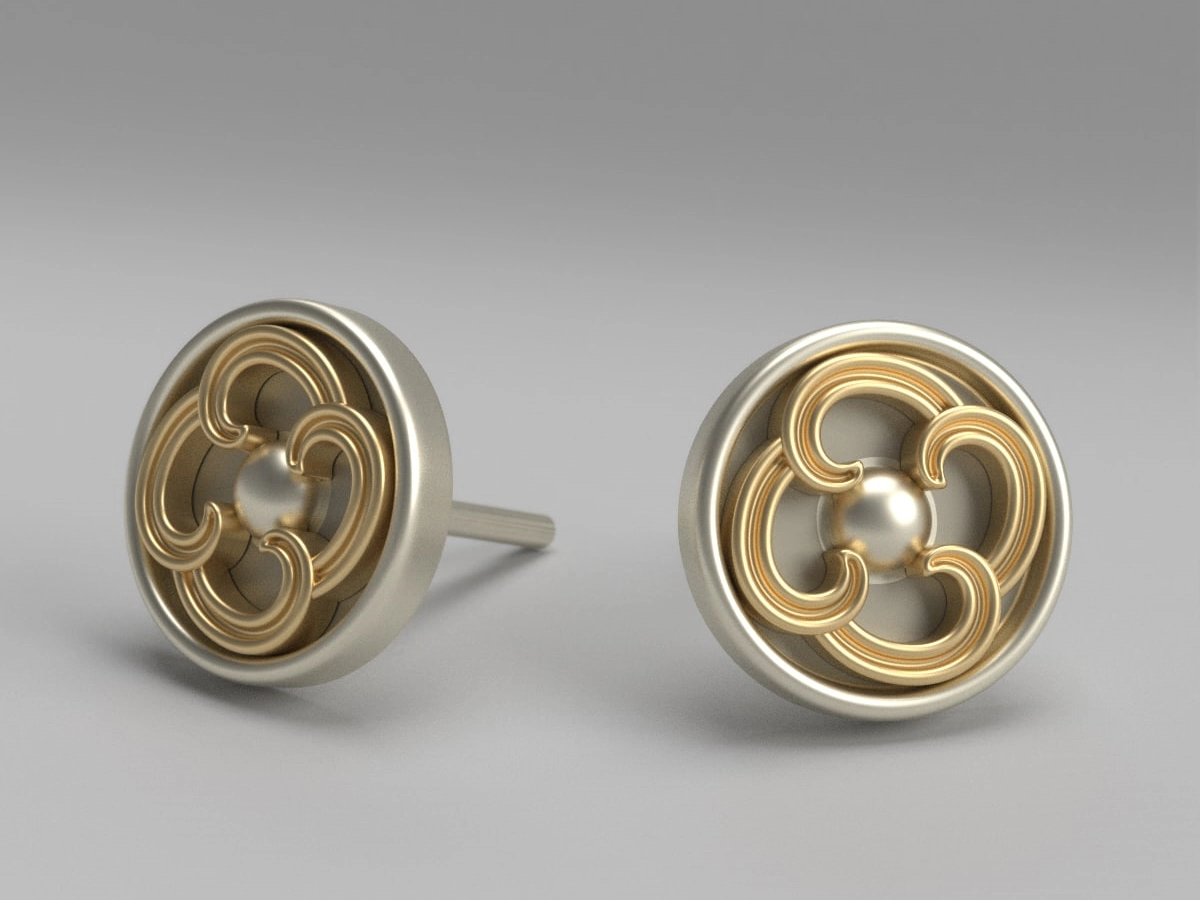
В дополнительном задании рассматривается команда растягивания объекта по поверхности с возможностью повторения объекта на примере японского орнамента.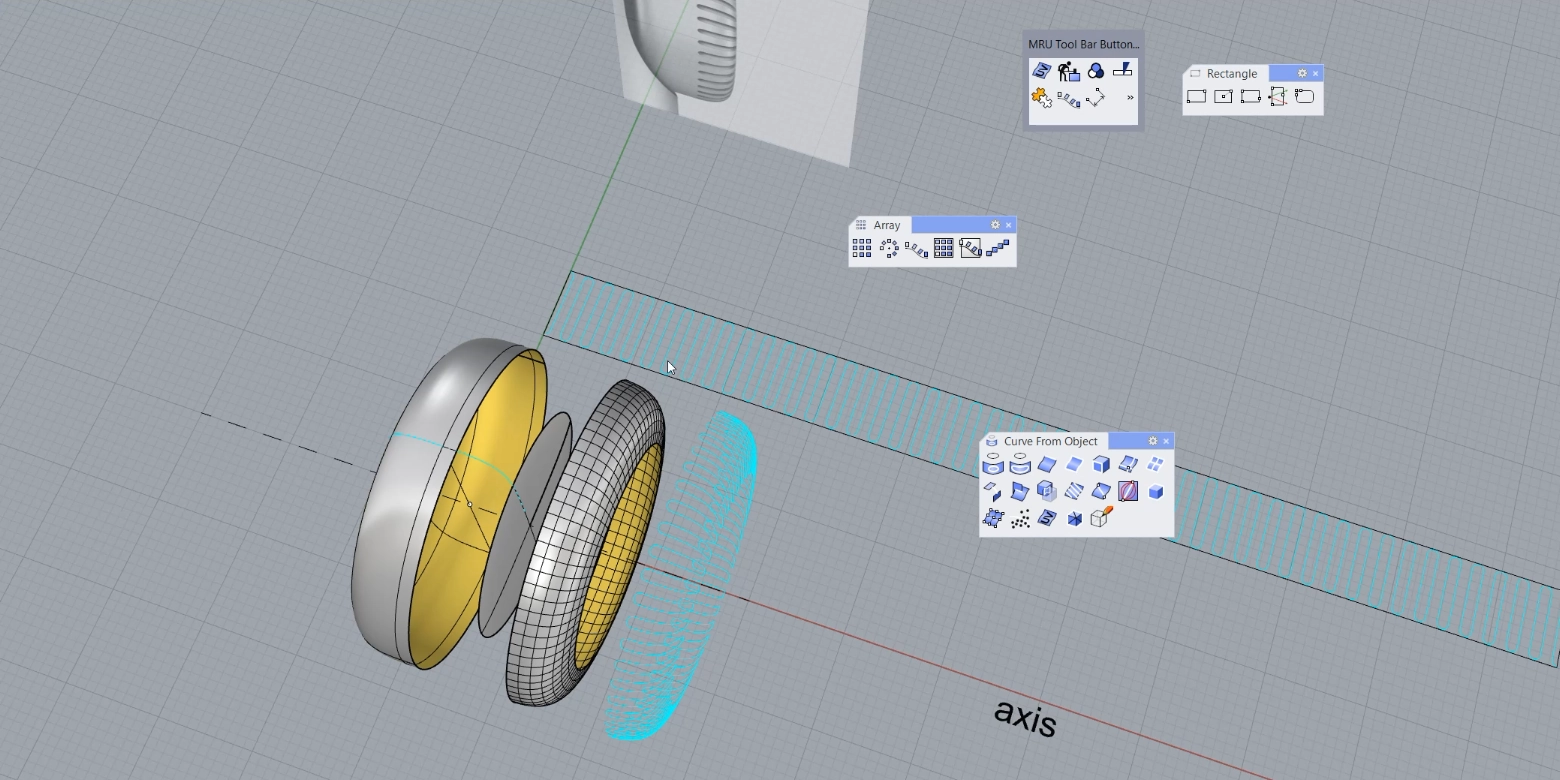
-
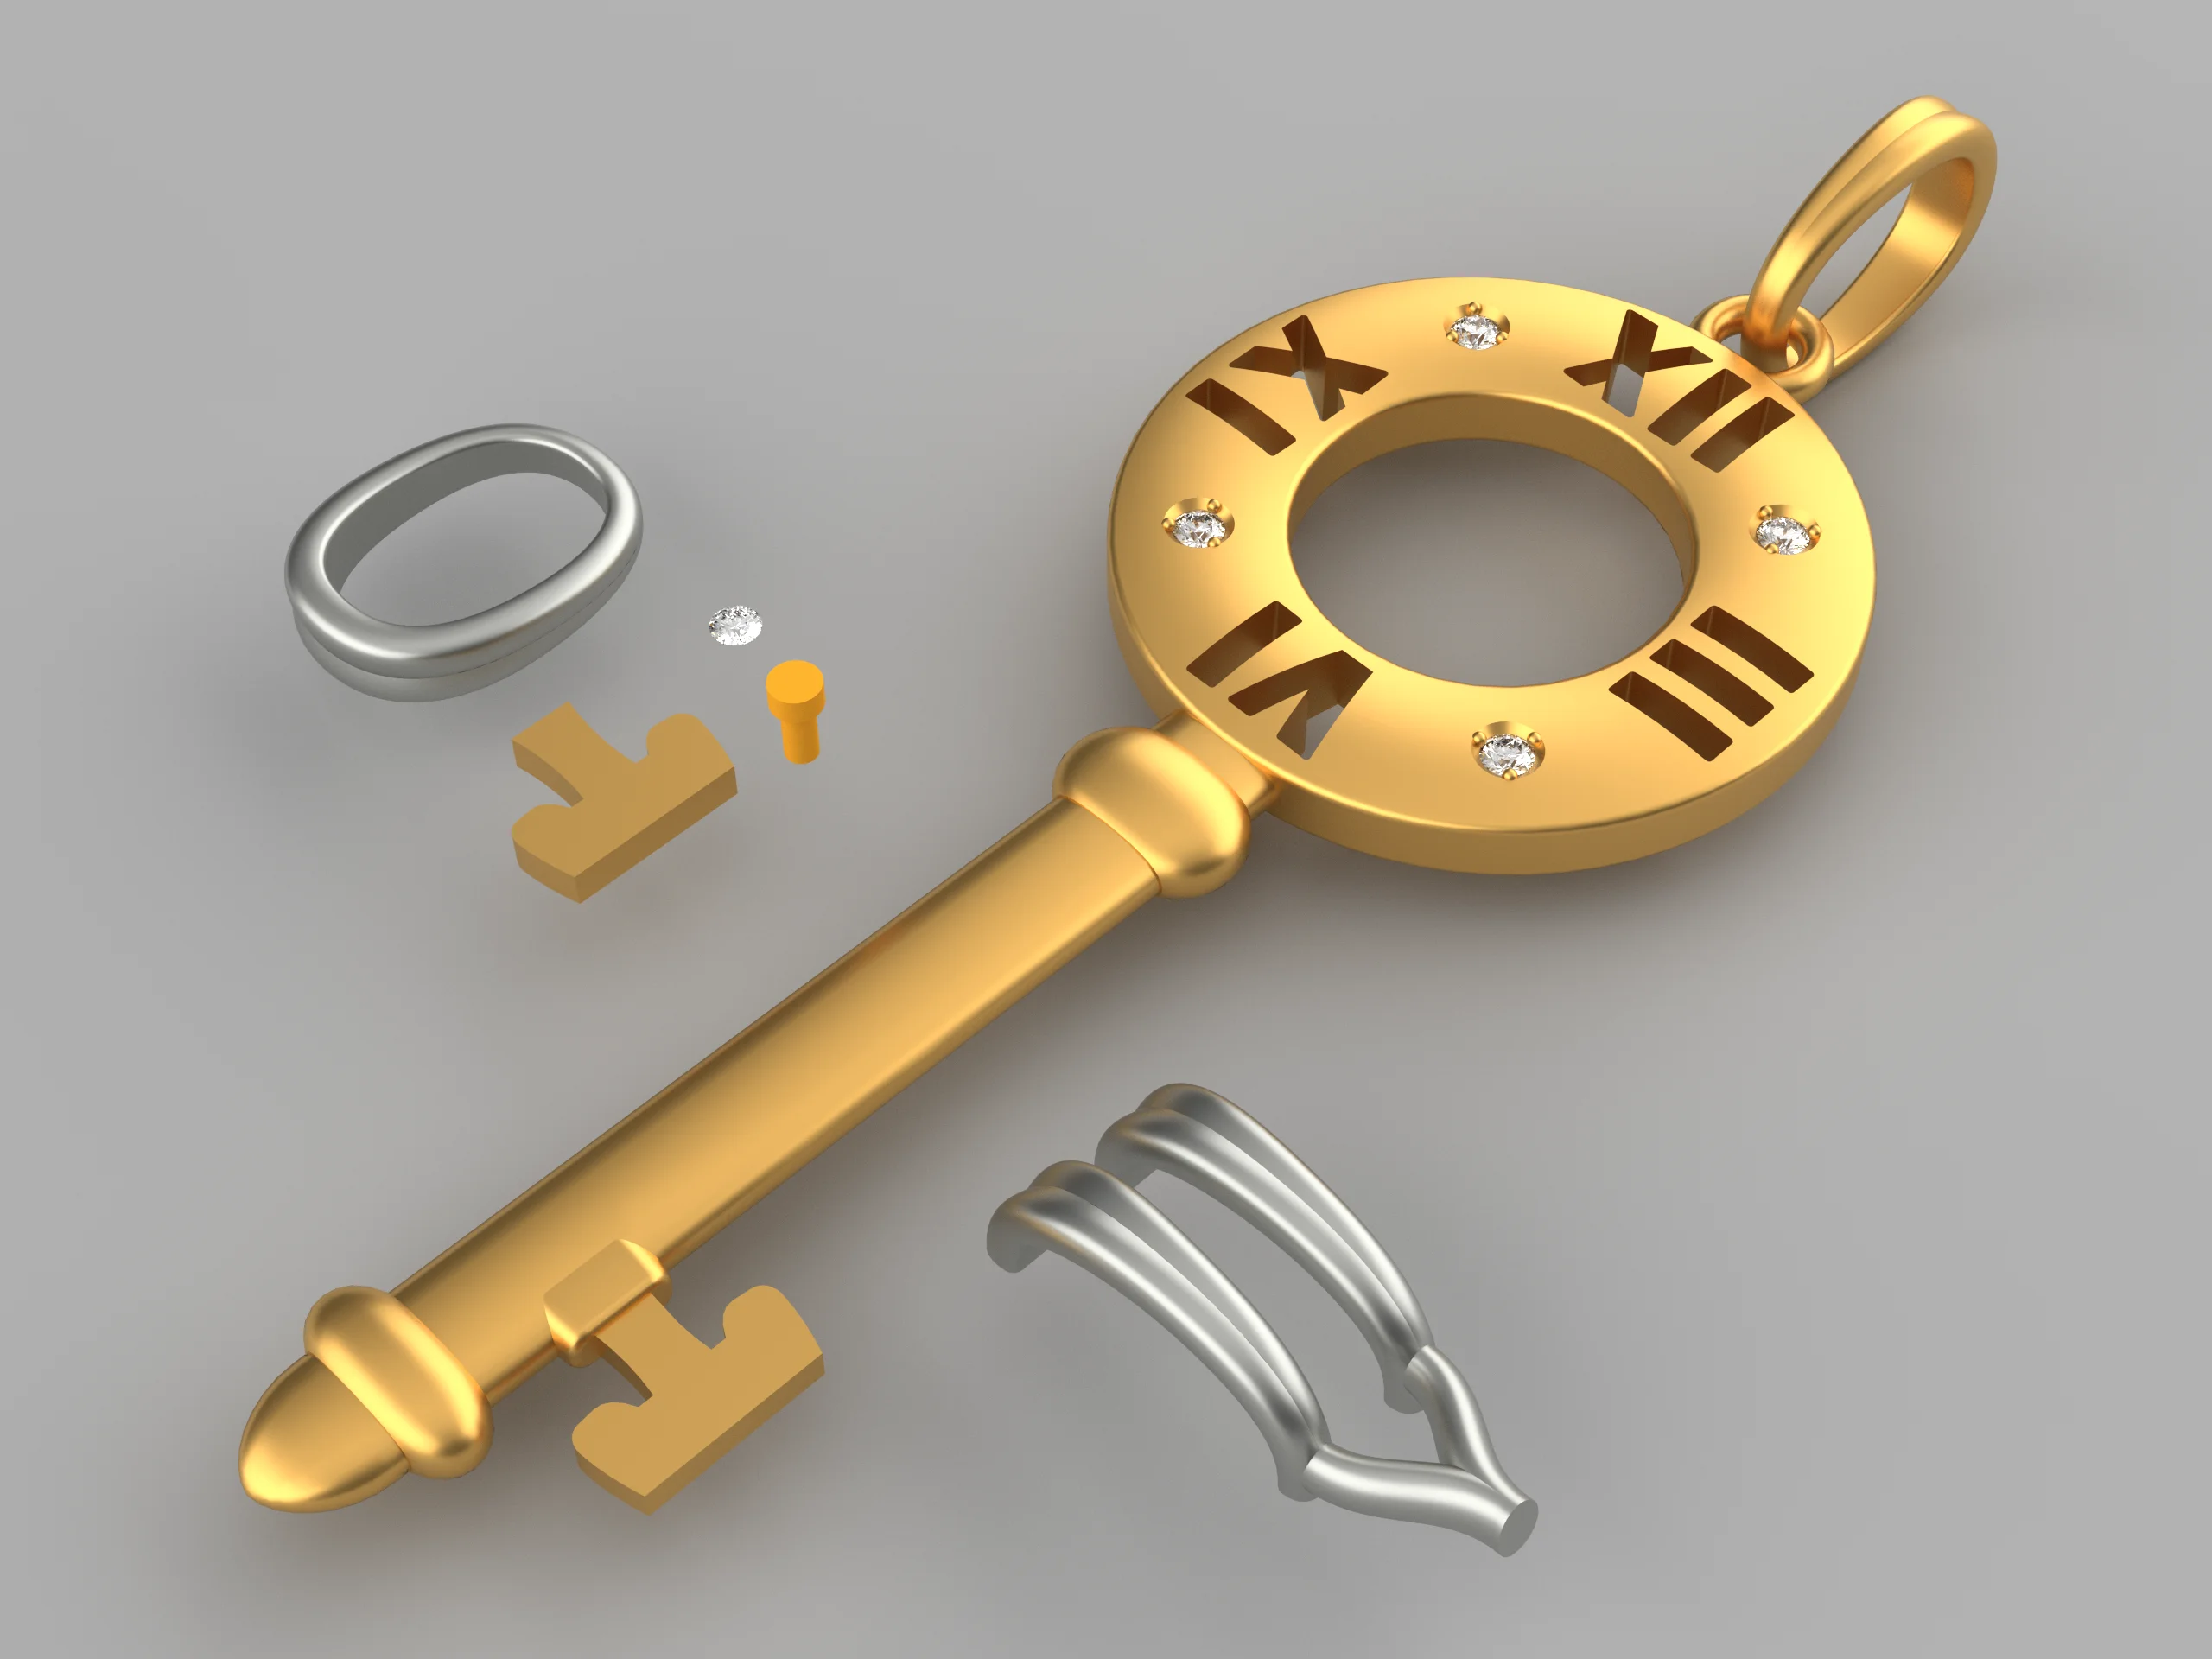
Блок 6. Визуализация
Моделирование готового изделия с нуля ожидает вас в завершающем блоке.
Финальный объект – подвеска в виде ключа с римскими цифрами. Суть данной темы – проект с преподавателем. От начала и до конца мы практикуем инструменты создания кривых, выдавленных объектов, применяем разные инструменты создания поверхности, поверхности объединяем в полиповерхности. Контролируем замкнутость ребер, Уделяем внимание подготовке объекта для 3D печати. Объект можно вырастить на 3D принтере, отлить из разных металлов, сделать ледниковую систему с учетом усадки для серийного производства. То есть модель связана с производством и имеет практическое применение.
В заданиях проектируем римские колонны. Прокачиваем навыки создания кривых, поверхностей, расстановки мелких объектов вдоль кривых. Моделируем секционную стенку, используя навыки работы с историей, родительским и дочерним объектами, контрольными точками. Проработаем стену с помощью Grasshopper.
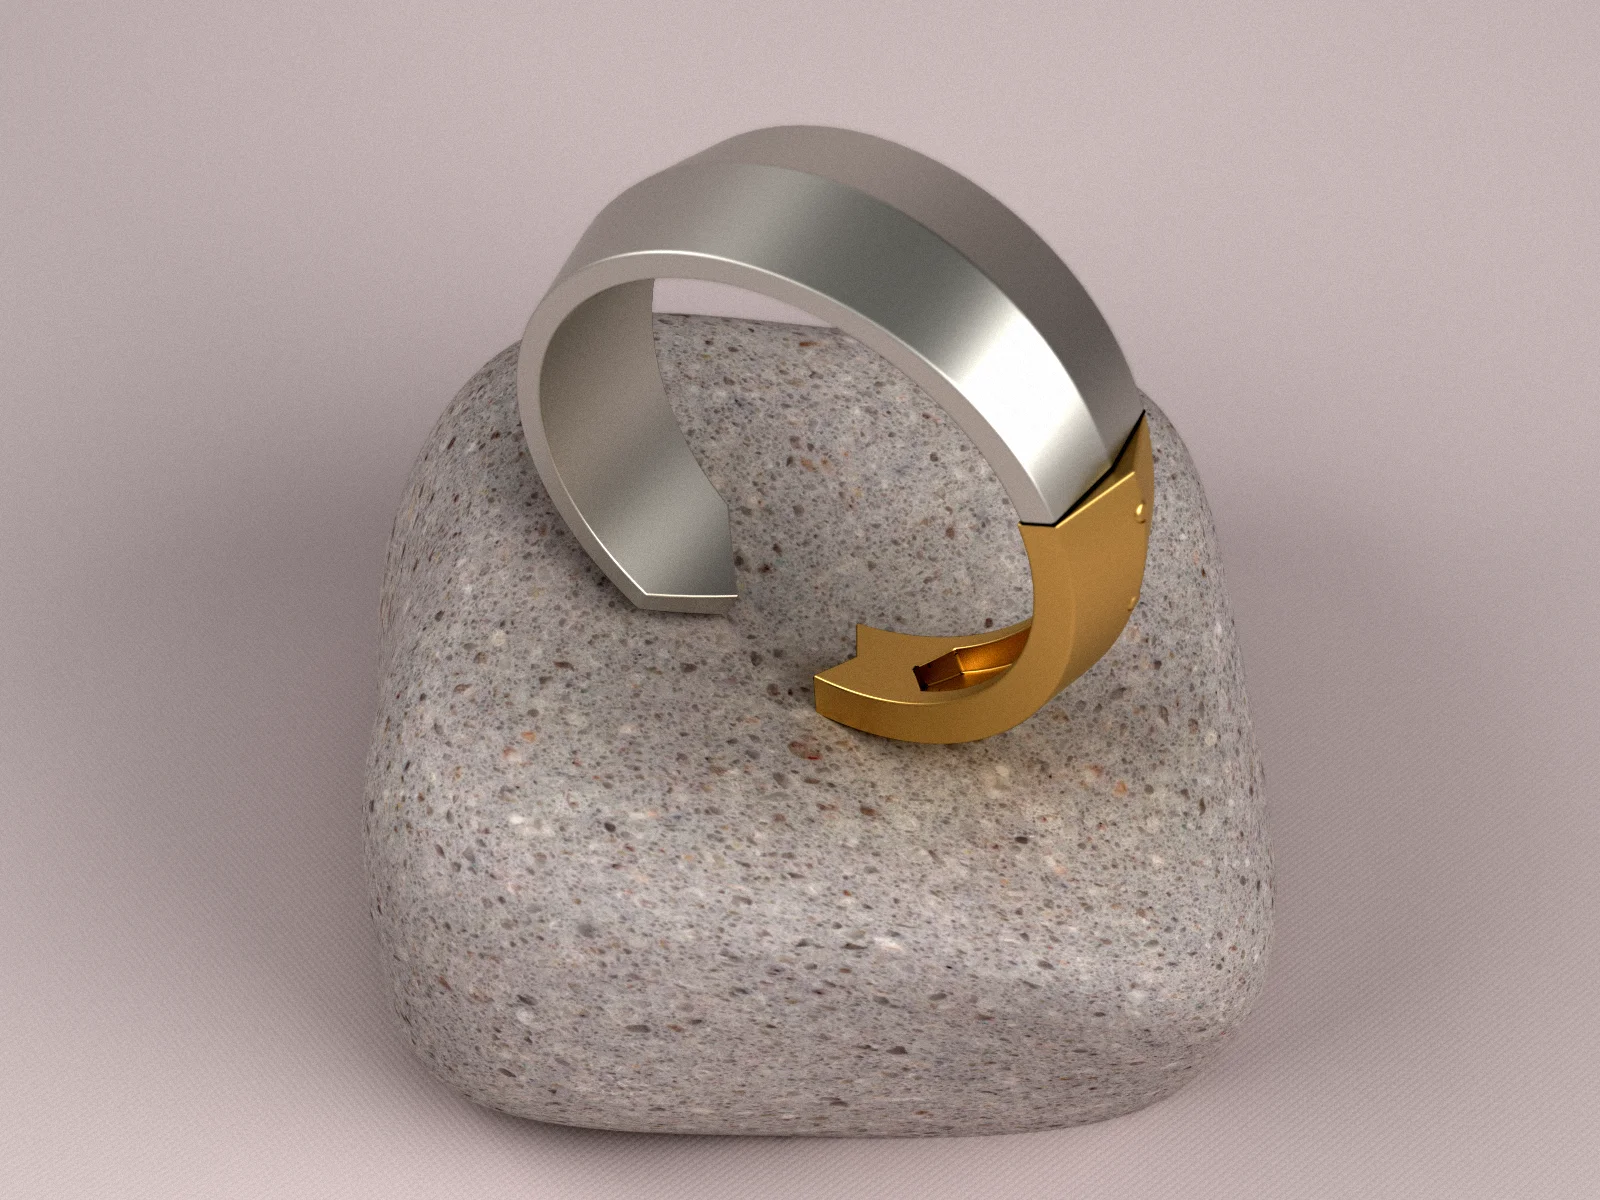
В дополнительном задании добавляем текстуры в модель браслета (physical based material), используя готовые и пользовательские материалы для визуализации объекта.
-
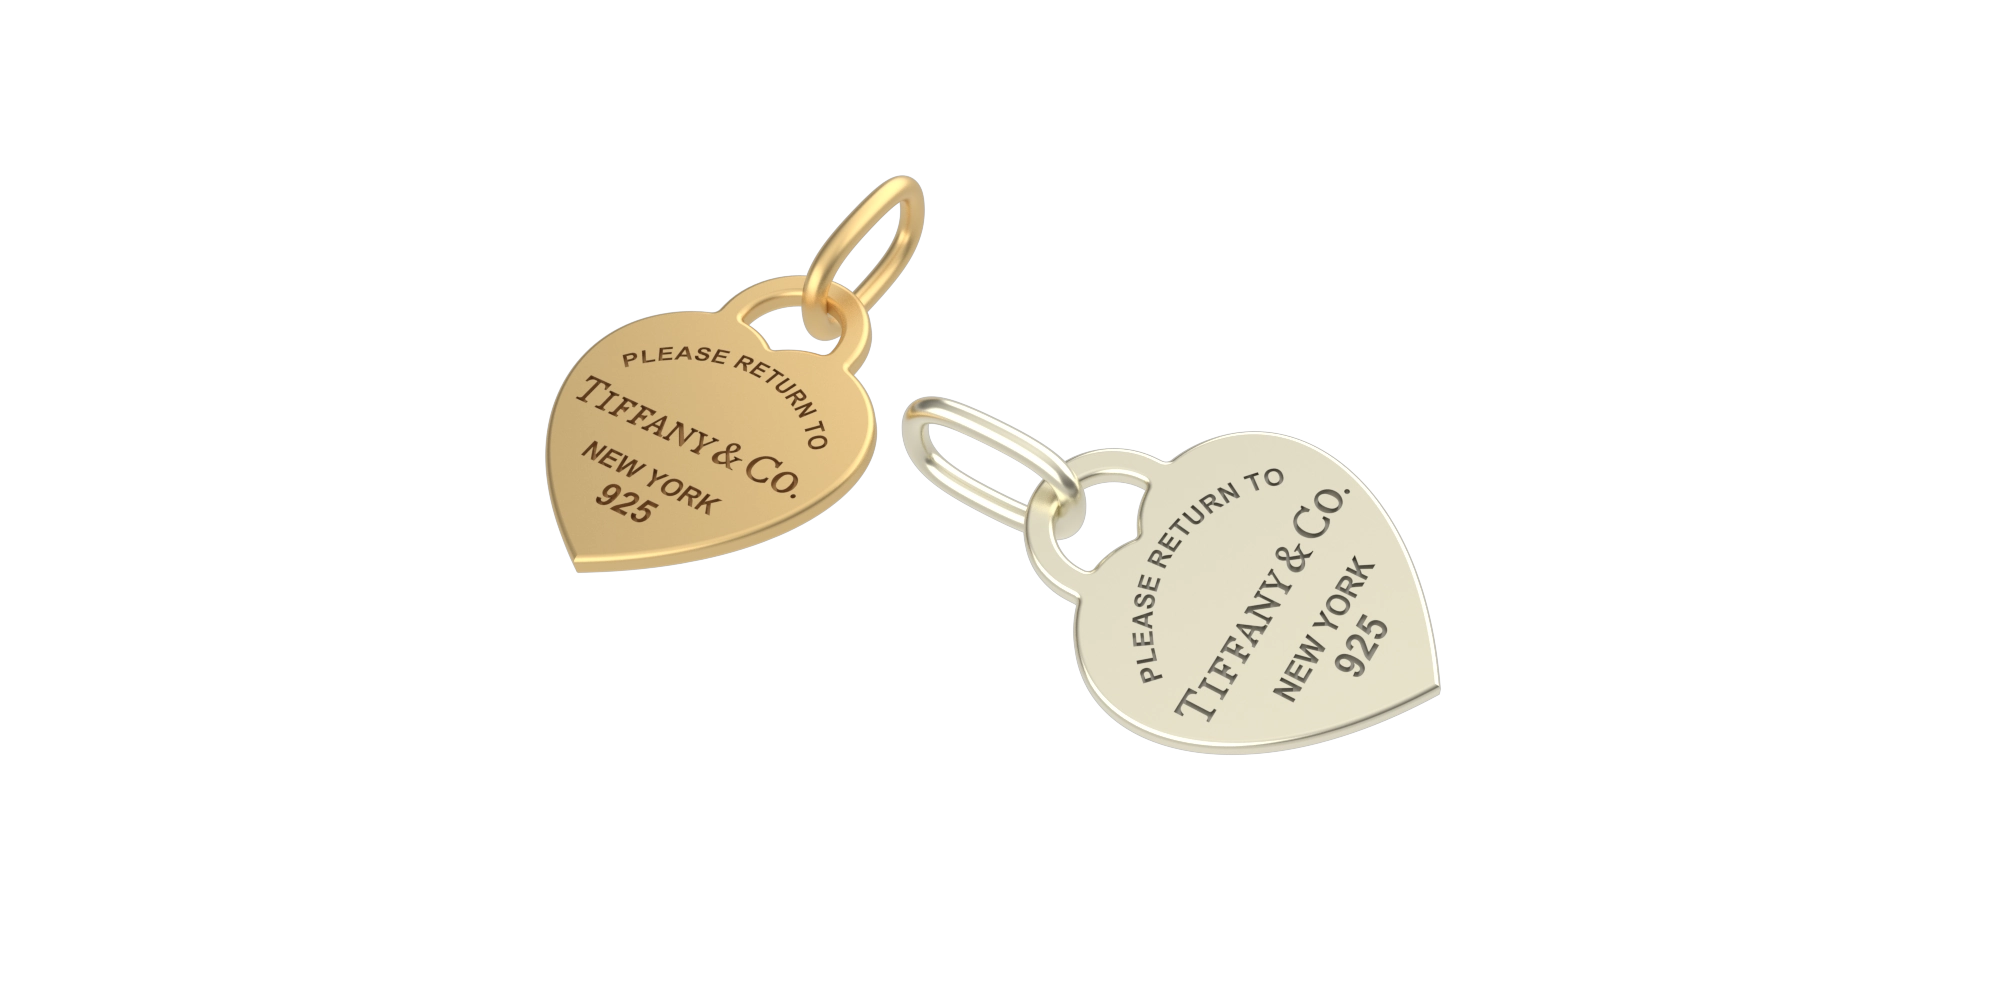
Блок 7. Моделирование подвески
Данная тема охватывает несколько ключевых аспектов:
1. Создание основы подвески:
Как легко и быстро создать основу для подвески с возможностью гравировки или внедрения логотипа. Преподаватель использует самый эффективный метод – выдавливание кривой, что делает процесс создания 3D-формы доступным даже для новичков.
2. Размещение текста вдоль кривой:
Особое внимание уделяется навыкам размещения текста вдоль созданной кривой. Этот инструмент позволяет равномерно распределить буквы по дуге подвески, что придает ей индивидуальный и профессиональный вид.В итоге, этот урок не только научит вас создавать уникальные 3D-модели подвесок, но и предоставит полезные навыки в работе с гравировкой и текстом, что может быть важным для дизайнеров и тех, кто интересуется созданием украшений.
-
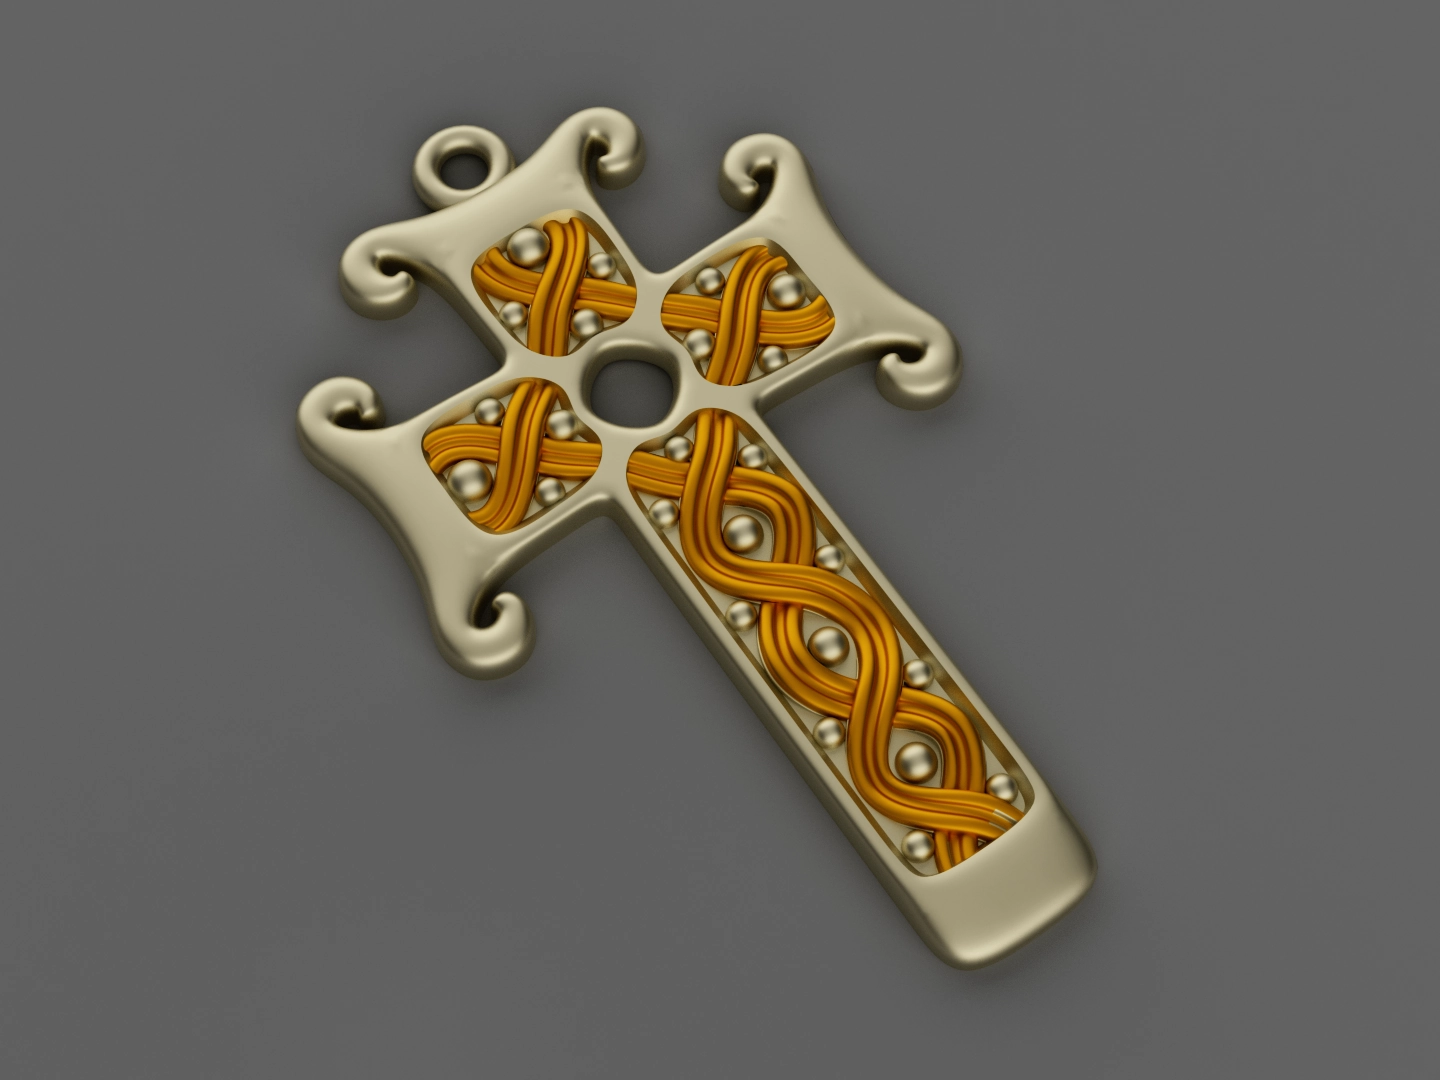
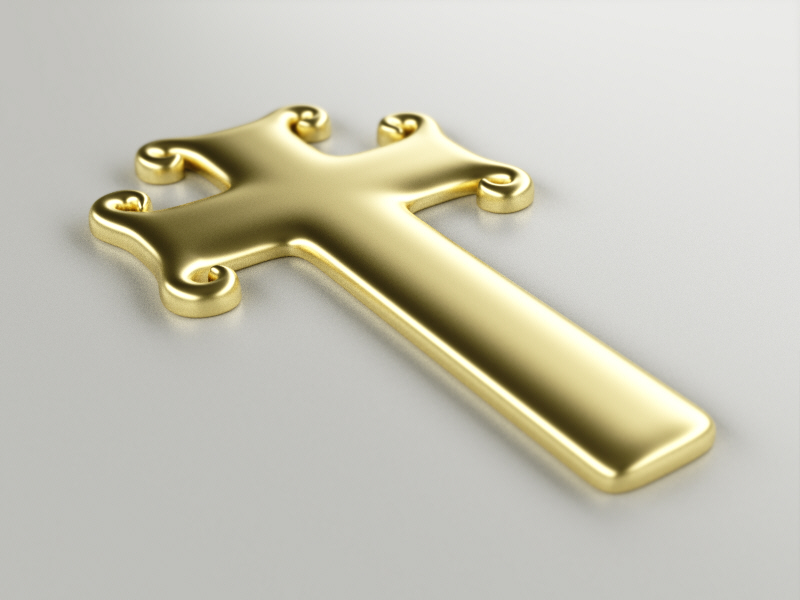
Блок 8. Моделирование крестика
В данной теме рассматриваются возможности инструментов Subdivide (SubD) в моделировании. Создание модели базовой формы крестика с плавными контурами позволяет продемонстрировать потенциал использования инструментов SubD для формирования органических и гладких форм. Урок обещает пролить свет на техники, позволяющие достичь более естественного и органичного вида при моделировании с использованием SubD.
-
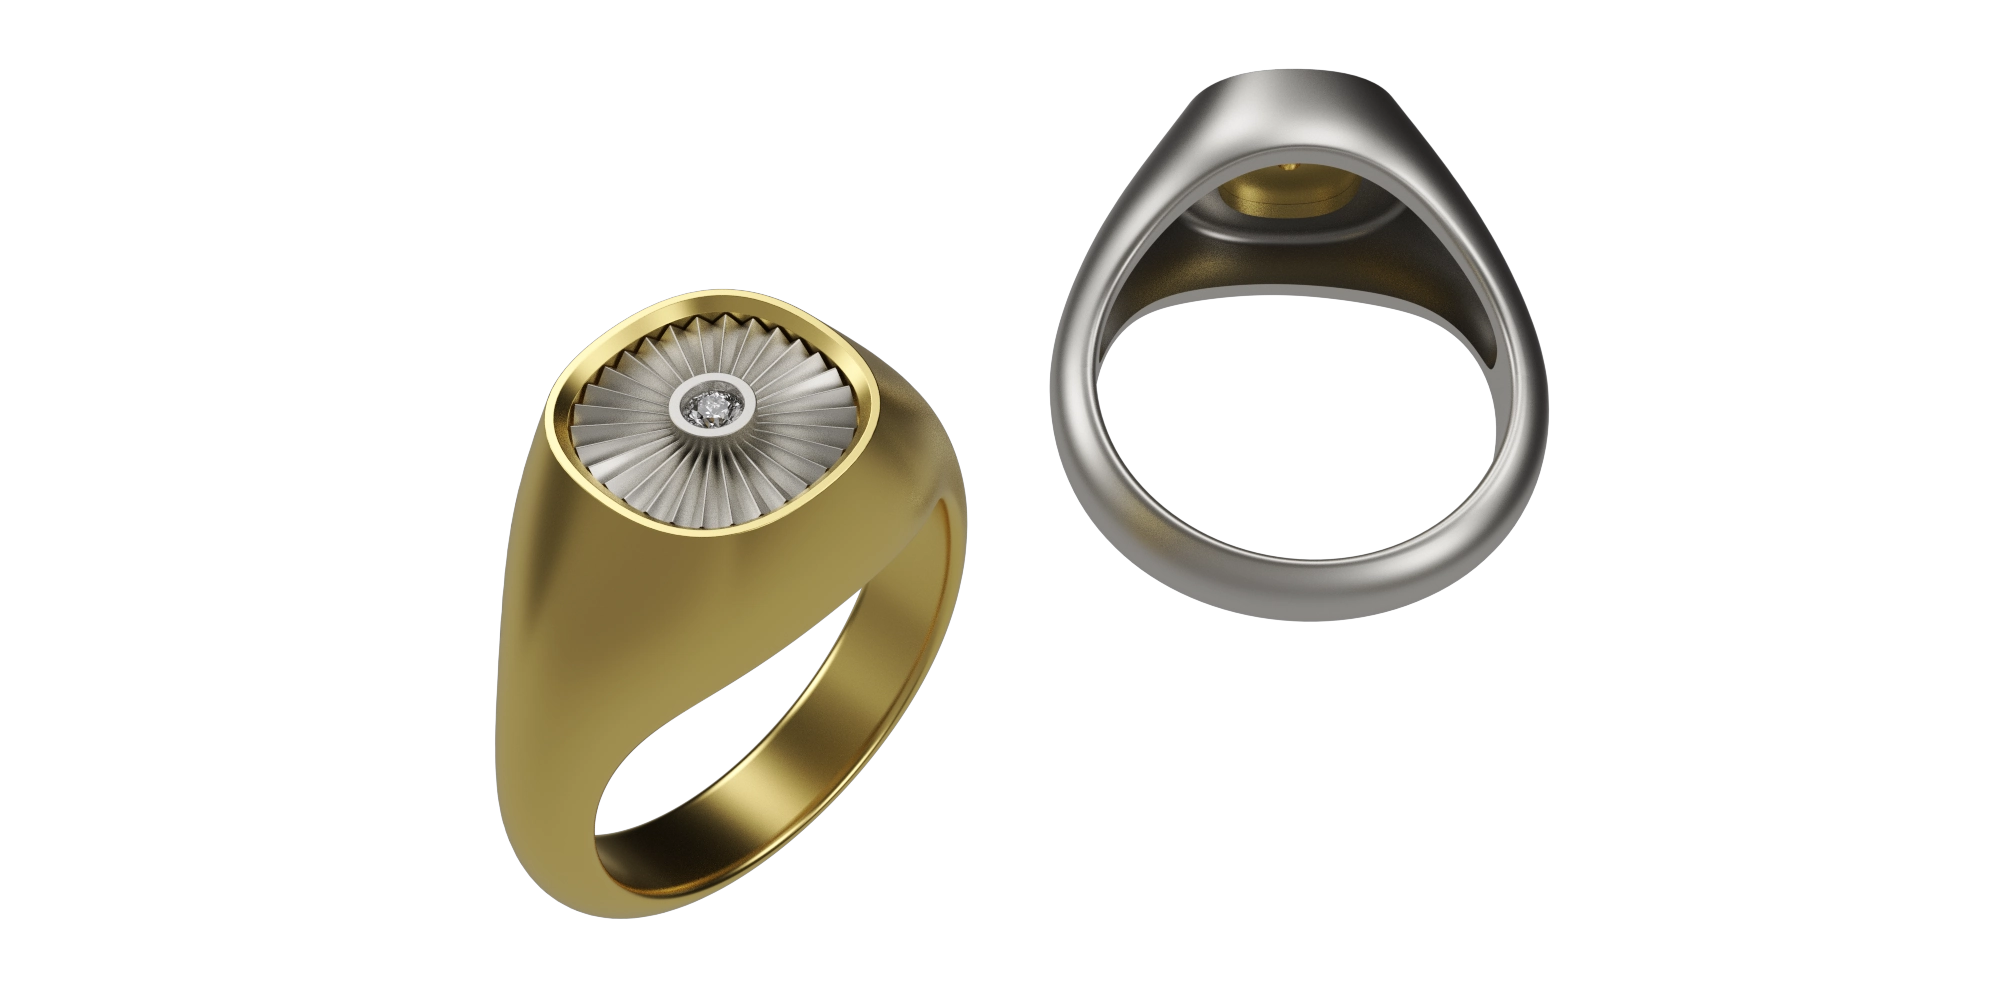
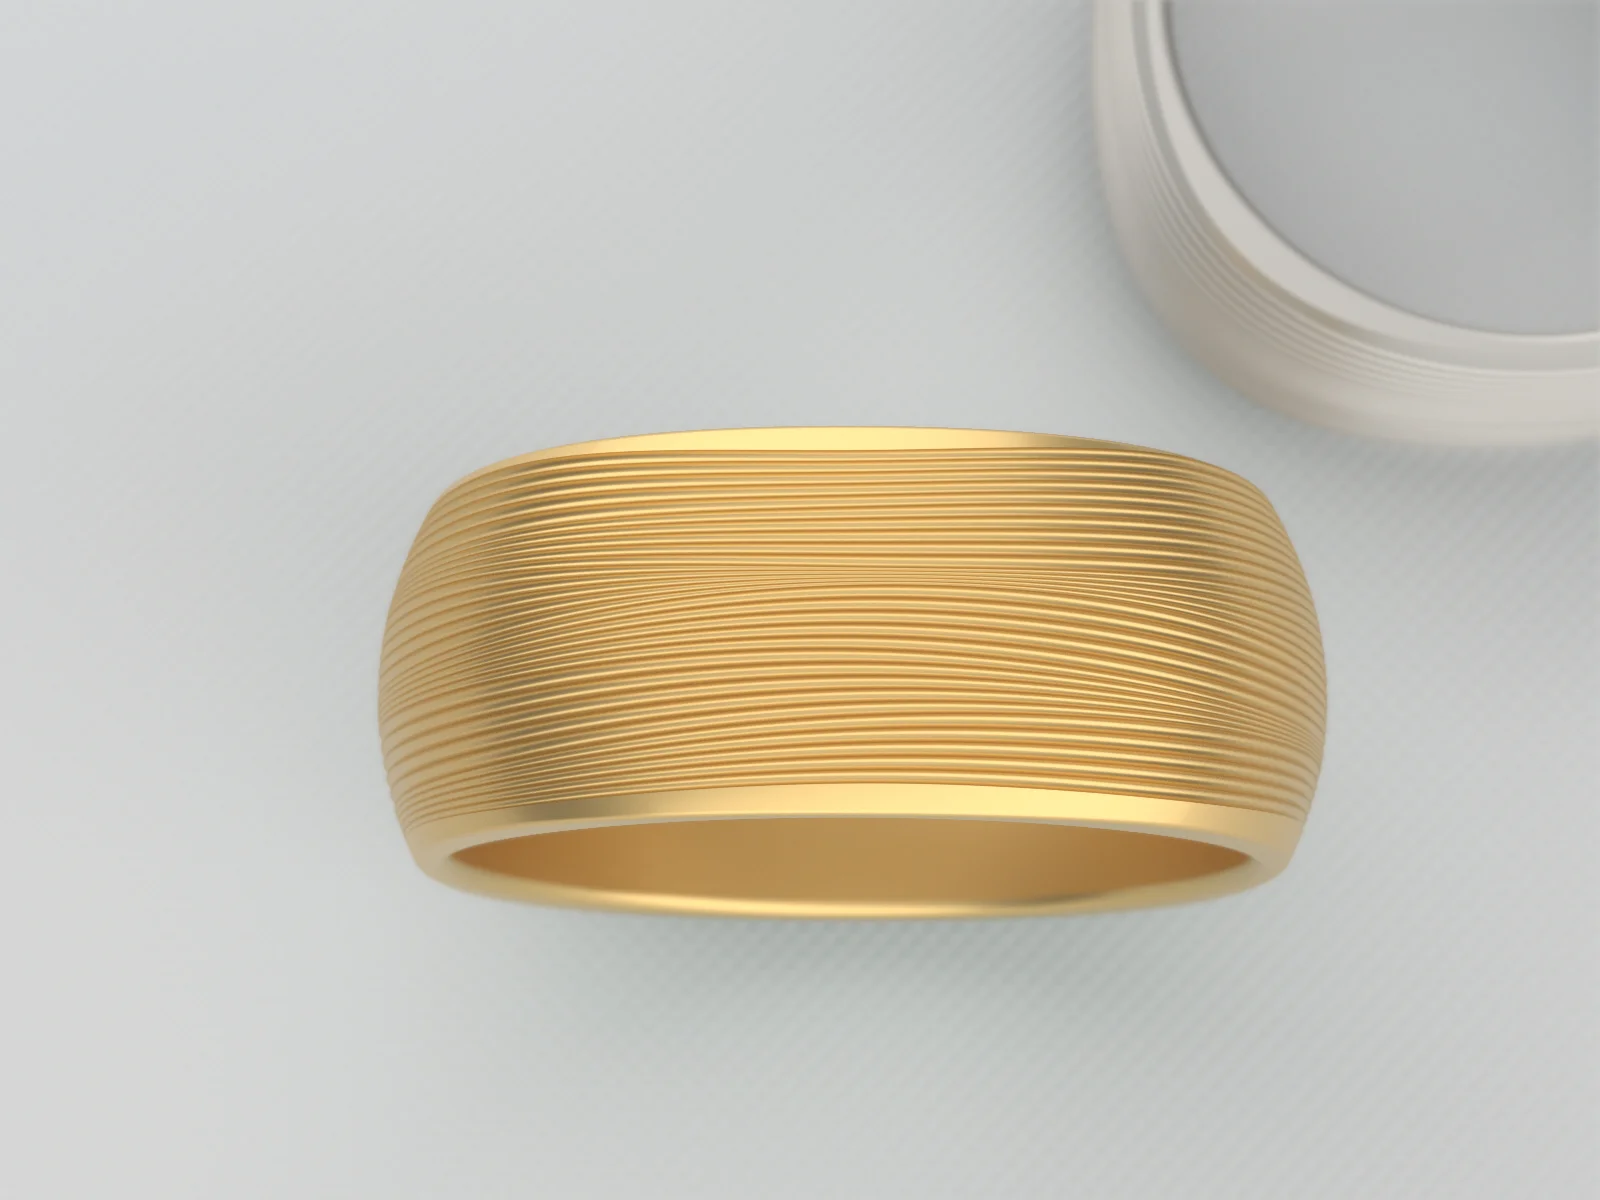
Блок 9. Моделирование печатки
В данной теме рассматривается процесс моделирования печатки с использованием инструментов создания поверхностей. Автор подчеркивает, что основная часть работы связана с созданием заготовок из кривых. Вам предоставляется возможность узнать, каким образом можно выполнить выборку, чтобы достичь необходимой толщины стенок кольца. Вы получите практические навыки по моделированию. Тема может быть полезна для тех, кто интересуется 3D-дизайном и созданием сложных форм.
-
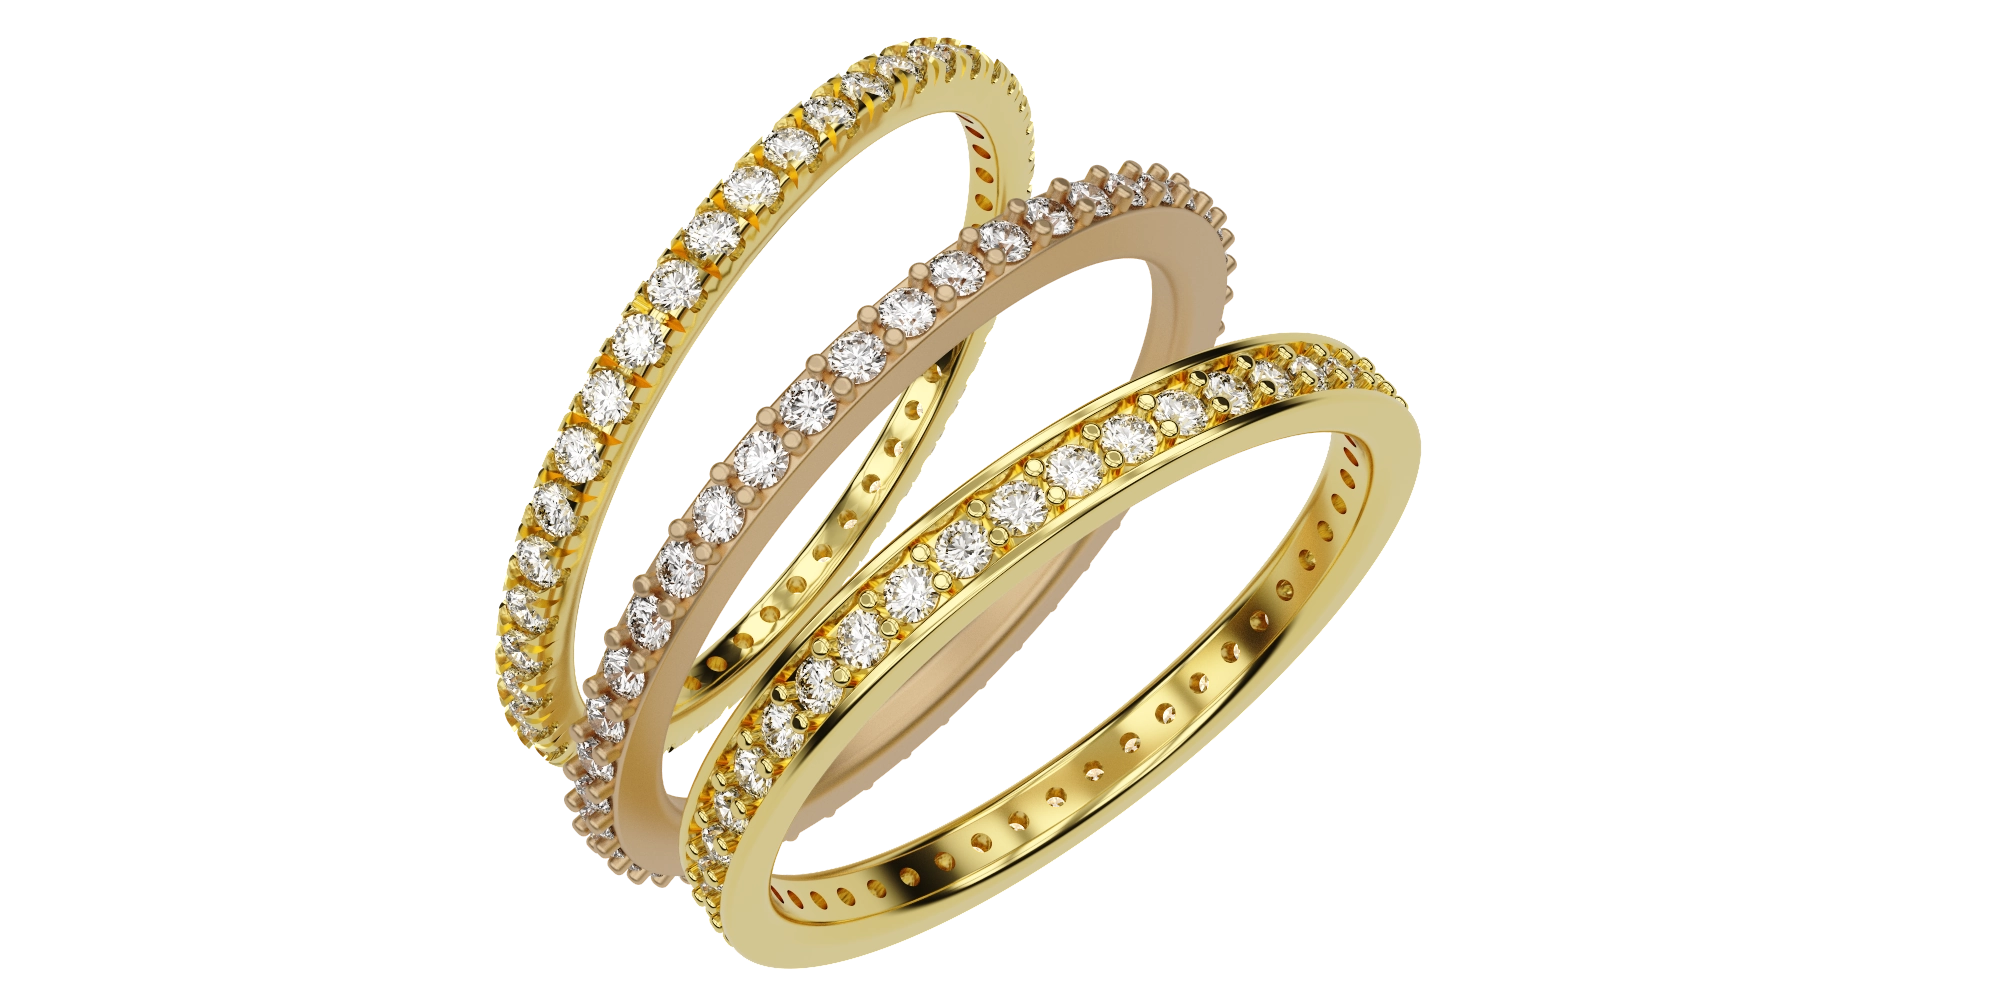
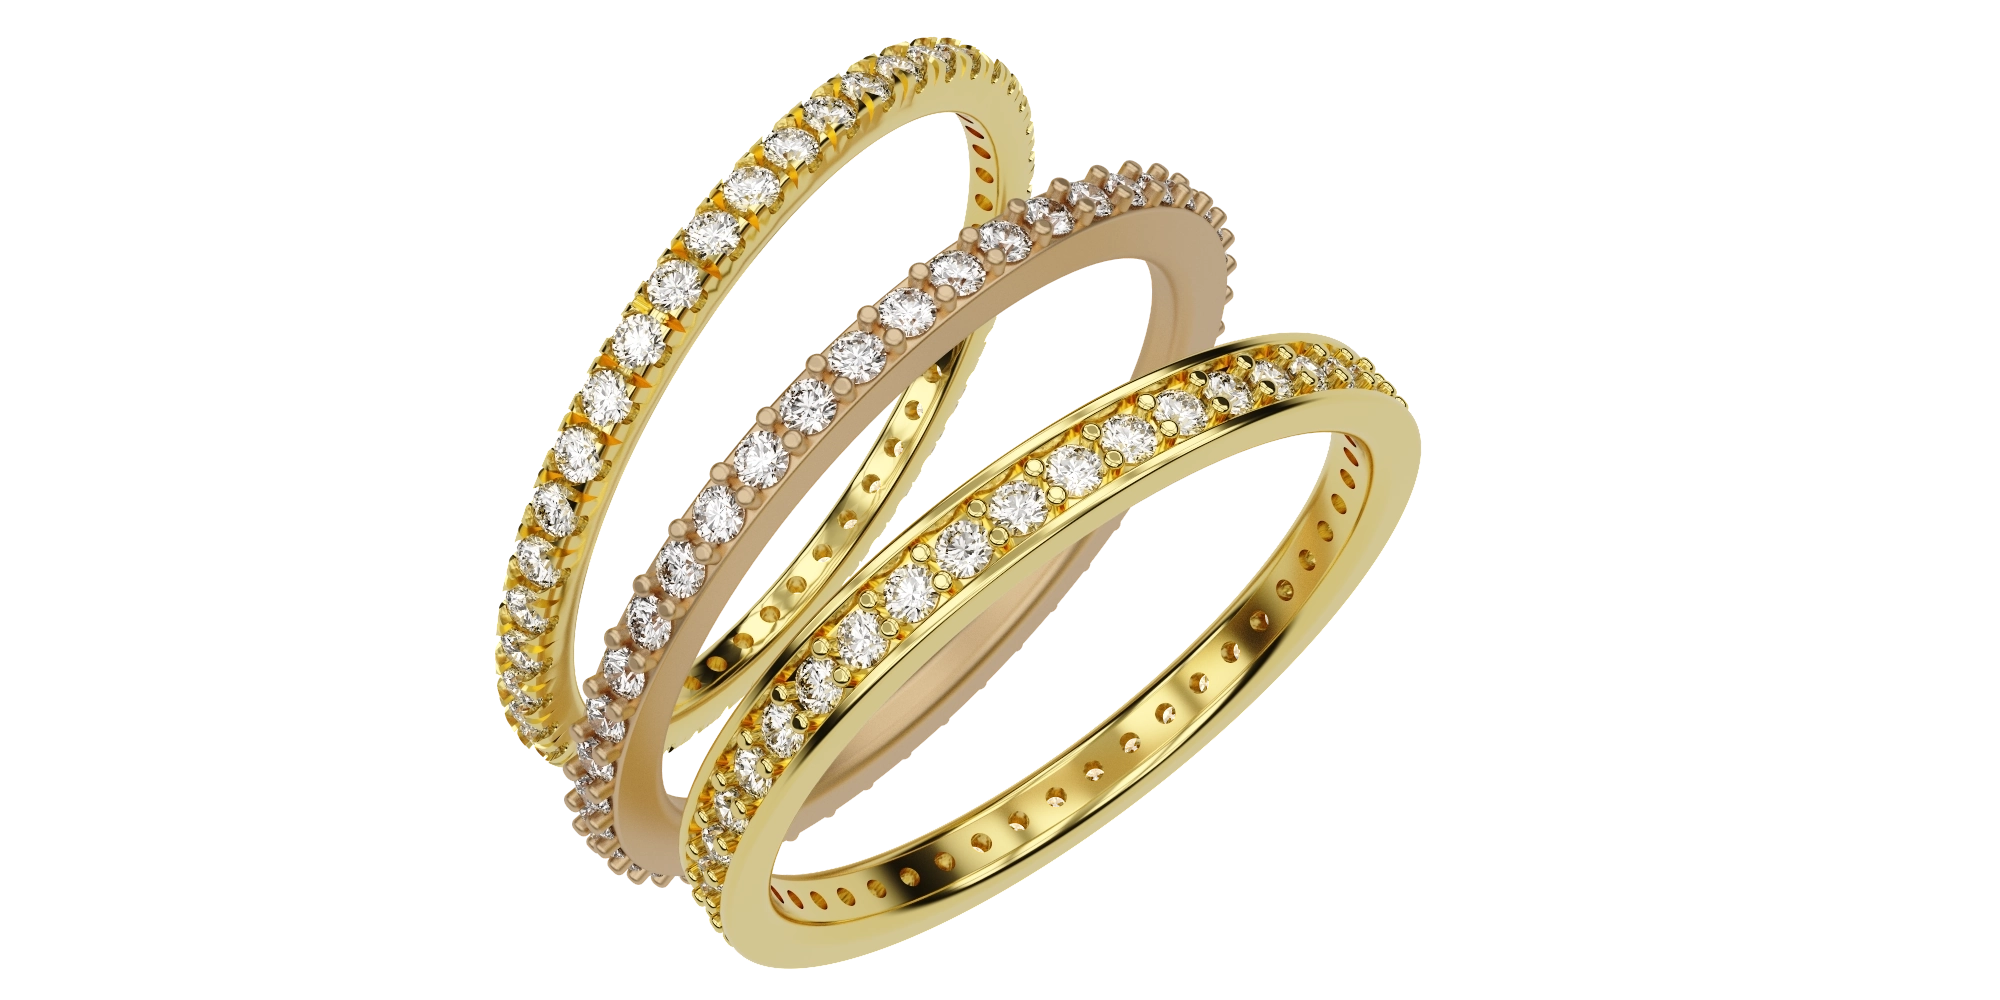
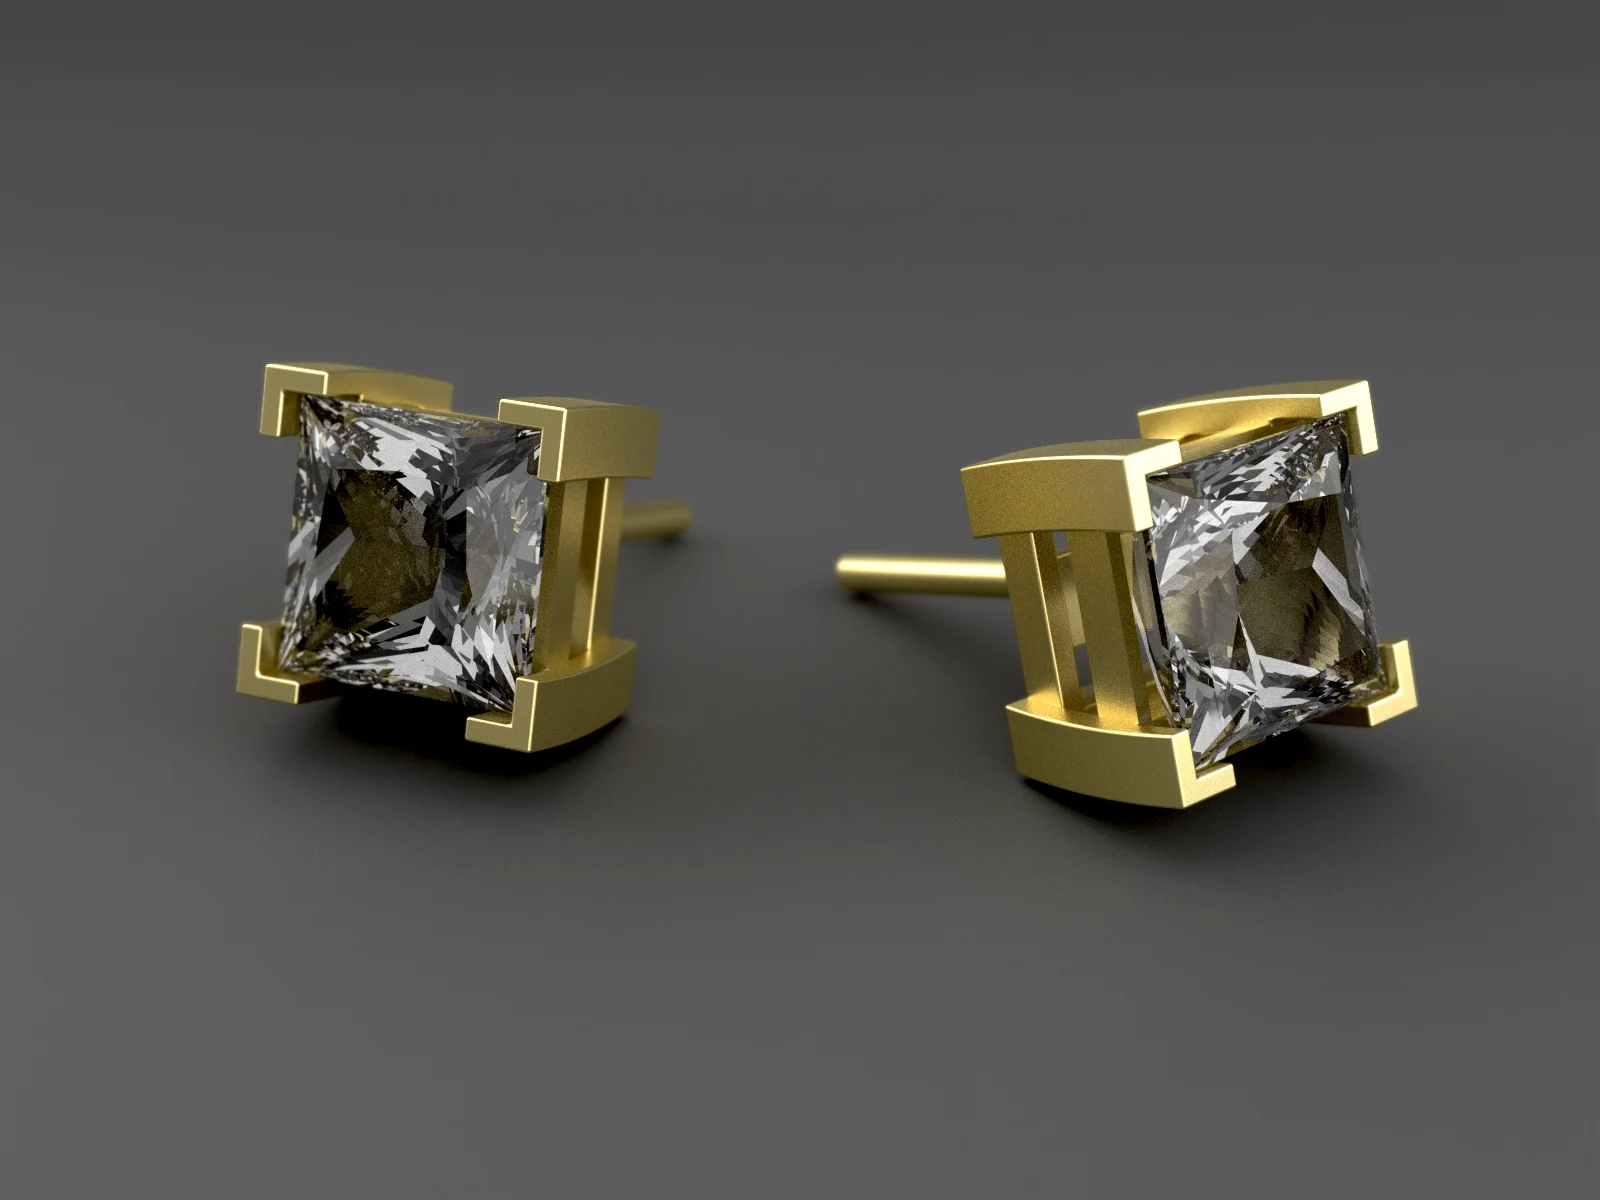
Блок 10. Методы расстановки вставок по поверхности кольца
В данной теме рассматриваются распространенные методы расстановки вставок по поверхности кольца. В ходе обучения моделируются три различных типа основы: с бортиками, квадратное сечение без бортиков, а также основа под U-Pave. Урок предоставляет практические навыки по созданию различных элементов и открывает пространство для экспериментов с разными стилями и формами.
Ювелирный дизайнер
С нами Вы научитесь создавать 3D модели украшений различной сложности и станете востребованным специалистом в ювелирном дизайне. Ювелирная индустрия будет существовать всегда, ведь красота это движущая сила человечества.
-
-

-
-
Старт курса
По запросу
-
Длительность
65 дней
-
Расписание
2 часа каждый день
-
Форма обучения
Уроки в записи, обратная
связь с преподавателем -
Язык
Русский
Откройте для себя наш курс!
Присоединяйтесь к нашему курсу с уверенностью: если первое занятие не оправдает ваши ожидания, мы вернем вам деньги.
Мы уверены, что вы останетесь впечатлены, потому что ваш успех — наш приоритет!
Для кого?
Курс обучения предназначен для всех, кто хочет не только освоить инструментарий программы, но и получить базовые профессиональные навыки в сфере 3D моделирования в Rhinoceros. Никакой специальной подготовки и знаний не требуется.
Чему научитесь?
- Получите базовые навыки 3D моделирования в Rhinoceros
- Создавать модели для 3D печати
- Редактировать модель используя инструменты трансформации
- Строить поверхности по эскизу соединяя все в единую форму
- Использовать параметрический подход к проектированию
- Создавать реалистичную визуализацию
Как проходит обучение?
Процесс обучения осуществляется с помощью самостоятельного изучение материала Учеником по урокам и выполнения заданий. В конце каждого блока необходимо выполнить задание. Базовые задания обязательны к выполнению. Дополнительные задания с повышенным уровнем сложности выполняются по желанию ученика. Преподаватель проверит правильность выполнения задания, даст обратную связи и ответит на все вопросы по заданию.
Работы учеников
Программа курса
-
10
Блоков
-
160
Уроков
Каждый блок состоит из уроков в записи. В конце каждого блока необходимо выполнить задание. Базовые задания обязательны к выполнению. Дополнительные задания с повышенным уровнем сложности выполняются по желанию Ученика. Преподаватель проверит правильность выполнения задания, даст обратную связи и ответит на все вопросы по заданию.
Доступ ко всем материалам курса у Вас сохраняется в течение 1 года.
По окончанию курса вы получаете официальный сертификат от Авторизованного учебного центра McNeel.
Преподаватель
Владислав Кальченко
Авторизованный преподаватель McNeel
Автор курсов по 3D моделированию в сфере дизайна интерьера, промышленного дизайна, проектирования обуви и дизайна ювелирных изделий.
Более 12 лет профессионально работает в Rhinoceros, из которых 7 лет занимается обучением.
Фанат 3D моделирования, которому уделяет более 10 часов каждый день.
Автор серии ювелирных изделий для Giverola jewelry.
Широко использует в своей работе параметрический дизайн и Grasshopper.
Интересует корпоративное обучение?
Мы обучим Ваших сотрудников последним технологиями 3D моделирования для максимально эффективной и продуктивной работы.
Чем больше учеников, тем меньше стоимость курса!
Как преподаем?
Посмотрите фрагмент урока
Отзывы наших учеников
Стоимость обучения
Самостоятельное обучение включает уроки в записи и задания для самостоятельного изучения без консультаций с Преподавателем
Самостоятельно (Самостоятельное обучение)
- Уроки в записи
- Занятия в свободном темпе
- Базовые задания
- Дополнительные задания
155 €
С преподавателем (С проверкой заданий)
- Уроки в записи
- Занятия 2 часа в день
- Базовые и дополнительные задания
- Проверка заданий и обратная связь
249 €
Обучайтесь у экспертов
-

Авторизованный учебный центр McNeel
-

Официальный сертификат
-

Беспроцентная рассрочка
ТОП 10 вопросов
-
Что я смогу делать после прохождение курса?
Создавать 3D модели для 3D печати или чпу фрезеровки, работать на фрилансе как ювелирный дизайнер. -
В чем преимущество Rhino перед другими программами?
Благодаря широким возможностям и простоте использования, Rhino - это оптимальная программа для создания 3D моделей в сфере ювелирного дизайна, моделирования обуви и мебели, промышленного дизайна, параметрической архитектуры, машиностроения и медицины, а также для всего, что связано с 3D печатью и воссозданием 3D модели в реальной жизни. Если же Вас интересует разработка игр, видеороликов, то Вам лучше выбрать 3Ds Max. -
Какое расписание и длительность курса?
Время для прохождение уроков вы выбираете самостоятельно, длительность курса 1,5 месяца 2 часа в день. -
Какие навыки нужны для прохождения курса?
Достаточно базовых знаний пользователя ПК, необязательно иметь навыки работы в CAD-системах. -
Какой компьютер и программы нужны для прохождения курса?
ПК с Windows 8.1 (х64) и выше или Mac 10.14 и выше. Аппаратное обеспечение - ознакомьтесь с системными требованиями для Rhino 7. Программа Rhinoceros 7 (можно использовать демо-версию), Teamviewer (бесплатная версия). -
Доступна ли оплата частями в рассрочку?
Беспроцентная рассрочка возможна в индивидуальном порядке, свяжитесь с нами для обсуждения деталей. -
Смогу ли я вернуть деньги если передумаю?
Мы вернем Вам все деньги после первого урока, если Вам что-то не понравится. -
Если я не успею сдать задание во время?
Если Вы не успеваете выполнить задания блока, то сдавайте только выполненные задания. Невыполненные задания Вы можете сдать до окончания следующего блока. -
Выдается ли сертификат после окончания?
Да, мы отправляем Вам на e-mail сертификат о прохождении обучения. -
В течение какого времени доступны материалы курса?
Доступ ко всем материалам курса у Вас сохраняется в течение 1 года. В течение этого времени Вы можете пройти весь курс или какой-то блок повторно самостоятельно. При выборе курса с поддержкой Преподавателя доступ к курсу сохраняется на постоянной основе
Остались вопросы?
Получите консультацию
Вы так же можете написать нам на e-mail или WhatsApp для получения информации по курсу